Arranging the Desktop - Sections, Screens, Swipes and the Lock
Once the desktop holds the things you use, arranging them is a matter of a few long presses. This page covers moving and resizing squares, sections you can fold, several screens, the four swipes and the lock that keeps it all in place.
Why You'll Love This
A desktop is only comfortable when things are where your hand expects them. Maybe you want the radio in the top corner, the family photos on a second screen, and the rarely used apps folded away under a heading. And once it is right, you want nobody - including a curious child - to move anything by accident.
Everything on this page changes only the layout. No app, folder or file is ever deleted by rearranging the desktop.
- FastMediaSorter in the Standard edition or the noLegal edition, with the launcher desktop open - see Your launcher desktop.
- A few squares on the desktop to move around.
Start arranging
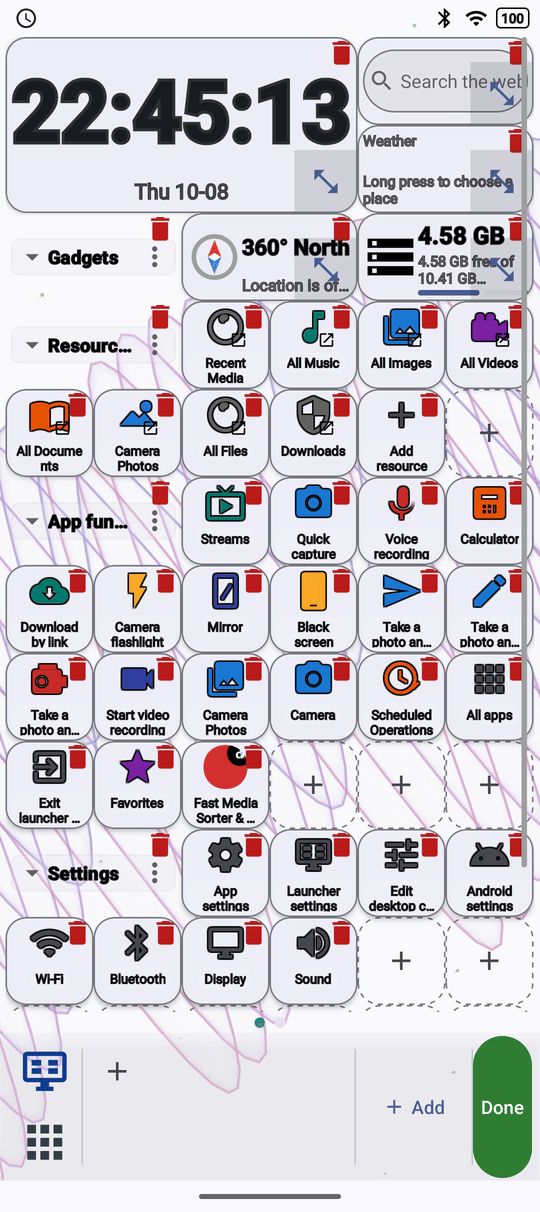
Touch and hold an empty square and tap Edit the desktop. The same is in the Start menu on the taskbar as Edit desktop contents.
Every square now shows a card with clear edges, and the taskbar shows Done and a + button. While arranging:
- Touch and hold a square, then drag it to another place.
- Drag the corner handle of a gadget to make it bigger or smaller.
- Tap the remove mark on a square to take it off the desktop.
- Tap + to add something. It goes into the first free place, or into a new row below everything when the desktop is full.
- Tap Done when you are finished.
The upright and the sideways screen keep separate layouts, so you can arrange each one the way it suits best.
Move things further than the screen shows
When the desktop is longer than the screen, a scroll bar appears along its right edge. Swipe to scroll, or grab the bar and drag it to jump quickly.
While you drag a square, hold it near the top or bottom edge and the desktop scrolls - the closer to the edge, the faster - so you can drop it in a row that was out of sight. Wide gadgets placed against the right edge are fitted inside the grid, so they never cover their neighbours.
Group squares into sections and fold them
A section is a heading with the rows under it, such as Main, Apps or App functions. Tap a heading to fold its rows away; tap it again and every square comes back to exactly where it was. A small arrow beside the name shows whether the section is folded, so a folded section is never mistaken for an empty one. Folding is remembered separately for the upright and the sideways screen and survives a restart.
Touch and hold a heading to open Section Actions: Rename Section, Re-sort Section or Delete Section. Deleting asks first, and removes the heading together with the shortcuts under it - you can add them again later. While arranging, the same menu opens from the button on the heading, and holding the heading drags the whole section.
To start a new section, choose Create a section.. when adding an item and give it a name, for example "Work".
Spread the desktop over several screens
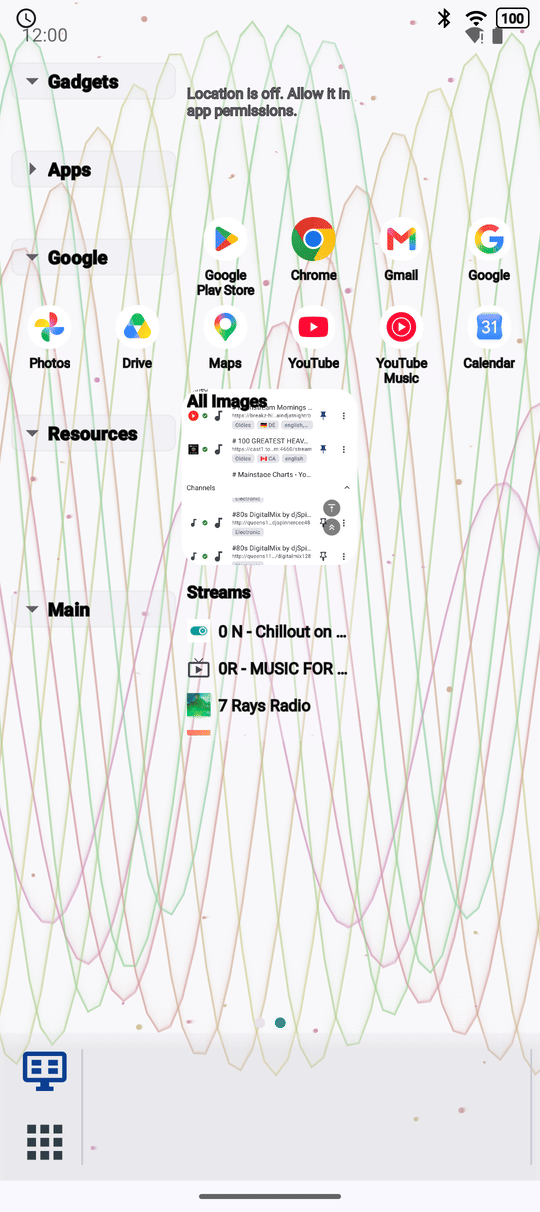
Touch and hold an empty square, tap Wallpaper, and under Screens set Number of screens. Swipe left and right to move between them. Turn on Show screen number to see which screen you are on while you page.
To move a square to another screen while arranging, tap it and choose Move to screen 2 (or whichever screen you want). Or drag it to the left or right edge and hold it there a moment: the desktop turns to the previous or next screen and you drop the square where you like.
Edit mode on a desktop with three screens, one shortcut tapped, the move menu open.
Choose what each swipe does
Open the launcher settings - Launcher settings in the long-press menu - and find the Gestures group. Tap Swipe up, Swipe down, Swipe left or Swipe right and pick an action from the list: the same actions the edge gestures offer, plus the launcher's own All apps, Next screen and Previous screen. For Open app or Open URL, the row App to launch below it asks which app or web address.
At the start, swiping up opens All apps - once you have reached the bottom of the desktop - and swiping down opens the Android notification shade. Left and right have no action, so on a desktop with several screens they turn the pages.
When swiping down opens the shade, where the swipe starts decides what you get: from the left half of the screen the notifications, from the right half Quick Settings.
A swipe works when it starts on an empty spot, on a shortcut, on a section heading or on the taskbar. On a gadget, the gadget keeps its own gestures - a map still pans and a list still scrolls. More gestures are in Customizing navigation gestures and shortcuts.
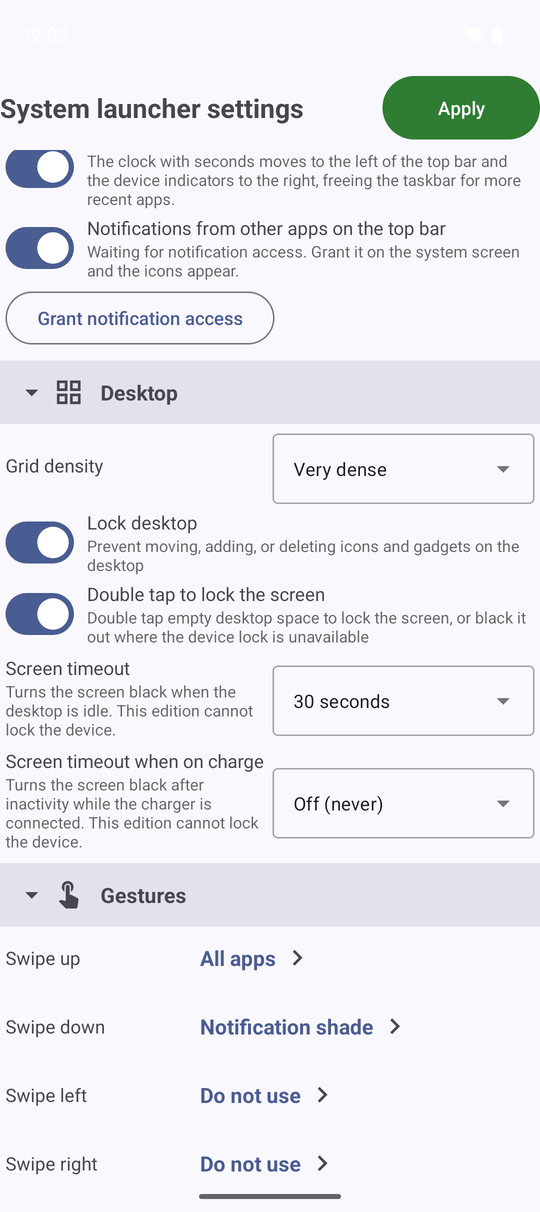
System launcher settings scrolled to Gestures, Swipe up set to All apps, Swipe down to the notification shade.
Make the squares bigger or smaller
In the launcher settings, Desktop group, Grid density sets how many squares fit in a row: Sparse, Standard, Dense or Very dense. Sparse gives big squares, easy to hit on a car screen; very dense fits the most on a tablet.
Lock the layout
When the desktop is the way you like it, touch and hold an empty square and tap Lock changes. From now on a long press does not open the menu or start moving things. If someone tries, a short message says The desktop is locked. Unlock it in launcher settings.
To unlock, open the launcher settings, Desktop group, and turn off Lock desktop. The same switch locks it too. Edit desktop contents in the Start menu keeps working even while the desktop is locked, so you are never shut out of your own layout.
What You Get
Every square sits where you want it, in sections you can fold, spread over as many screens as you need. Your swipes do what you chose, and a lock keeps the whole layout safe from accidental changes.
Tips and Troubleshooting
- Double tap on an empty spot locks the device screen, or blacks it out where the device lock is not available. Turn this off with Double tap to lock the screen in the Desktop group of the launcher settings.
- Rotated the device and everything moved? Nothing moved - the sideways screen simply has its own layout. Arrange the one you use, or both.
- A section heading got removed while arranging? Add it back with Add an item.. like any other square.
- Using a keyboard or a TV remote? See Keyboard, D-pad and Android TV control.